As summer comes to an end, it’s time to move your favorite cardigan to the front of the closet, look up your favorite football team’s schedule, and be prepared to see pumpkin spice-flavored drinks and foods everywhere. Fall is one of the coziest times of the year, and there are so many ways you can celebrate the season.
“Creating easy fall crafts is a great way to get into the fall spirit and kick off the season with a fun, positive note,” says Cristine Royer, Director of Marketing at The Estates at Carpenters, a senior living community in Lakeland, Florida. “These DIY projects are perfect fall crafts for seniors to get in touch with their creative side, which is also beneficial to their health and well-being.”
She added, “When seniors participate in arts and creativity, they can improve their cognitive function and memory. Creating crafts with others is also a perfect opportunity to make friends and socialize.”
Are you feeling inspired? Try these fall crafts for seniors this season!
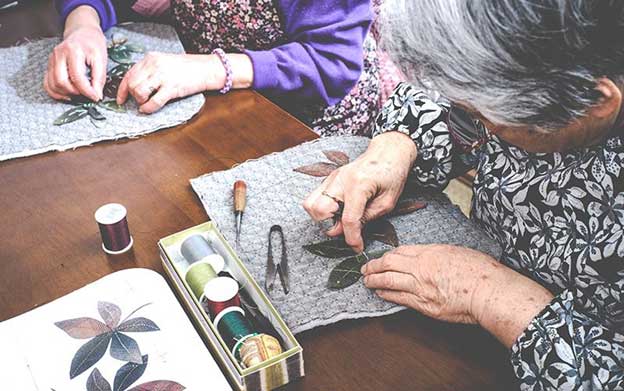 1. Pressed Leaf Bookmarks
This autumn accessory is perfect for booklovers. To make a pressed leaf bookmark, you start by collecting your favorite autumn leaves and flowers. Place them between paper towels and put them in a large book. This will help you press the leaves and flowers so they’re flat and dry. You can add extra weight to the top of your pressing book.
Now all you need is clear contact paper. Take your dry leaves and flowers and place them on the adhesive side of the clear contact paper. Cut off the excess paper.
Then, take another piece of clear contact paper and place it on top so the leaves and flowers are pressed in the middle. Trim the sides until you have the perfect bookmark shape.
2. Painted Wood Pumpkins
This is one of the easiest types of pumpkin crafts. Find plain wood pumpkin cutouts, get some paint and paint brushes, and you’re already on your way to a gorgeous fall craft.
You can paint your pumpkin however you like. You can make a classic orange pumpkin, or add stripes, polka dots, painted flowers – anything you like. Once the paint is dry, you can display your wood pumpkin where you can see it every day.
3. Fall Wreath
Out of all the autumn crafts for adults, this is a seasonal favorite for craft projects and a great piece of fall decor. All you need is a wreath ring, ribbon, faux leaves and flowers, and a glue gun.
Start to glue leaves and flowers around the wreath ring so the wires don’t show. If you’re using a grapevine wreath, you may want some of the details to show. Tie bows with the ribbon to add the perfect finishing touch.
You’re ready to display your fall wreath on your front door so everyone can enjoy your crafting skills.
4. Pine Cone Bird Feeders
Pine cone bird feeders are one of the craft ideas that don’t decorate your house – instead, you can feed birds. Using a pine cone, peanut butter, birdseed, and twine, you can make a craft that will attract beautiful local birds to your yard.
First, wrap the twine around the pine cone and tie it so you can use the twine to hang the pine cone on a branch. Then, you can either dip or use a utensil to cover the pieces of pine cone with peanut butter. Roll the pine cone over a plate of birdseed. The birdseed will stick to the peanut butter. Allow the pine cone to dry, and then place it on a tree outside. Try to find a spot you can watch from your window!
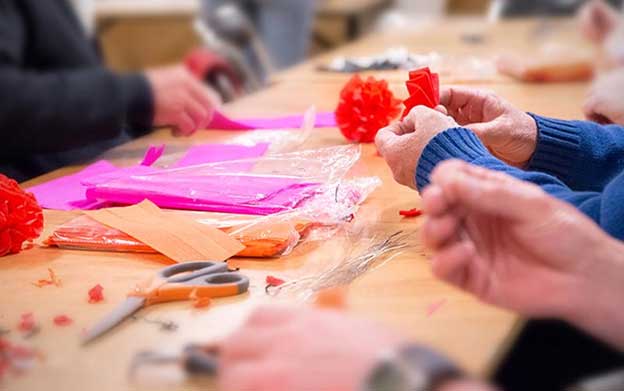 5. Tissue Paper Tree
All the craft supplies you need for a tissue paper tree are tissue paper with fall colors like orange, red, and yellow, a paper plate, glue, brown construction paper, and a black marker.
Cut the brown construction paper into a rectangle and glue it to the paper plate. Use the black market to draw lines on the construction paper to make it look like wood. Now you have the base for your tree.
Cut the tissue paper into small pieces so each piece can look like an autumn leaf. Don’t forget to lightly crumple the tissue paper to give it texture. Glue one part of the tissue paper on the paper plate, allowing some of the tissue to come off the plate. Do this until the entire paper plate is covered.
6. “Welcome Fall” Sign
Having a Welcome Fall sign will brighten any space with a message embracing the new season. All you need are wood plaques and paint.
You can paint the message “Welcome Fall!” on your sign, or other phrases like “It’s Fall, Y’all,” “Happy Harvest,” or any other message that you like best. You can dress up the sign with paintings of pumpkins, gourds, and sunflowers. Be sure to place your sign where everyone can enjoy it.
7. Floral Pumpkins
If you want to dress up your pumpkins, try adding flowers. Whether you’re creating a bouquet on top or a decorative strip of flowers going around the pumpkin, it’s a beautiful way to make a centerpiece or addition to your mantle.
Determine how you want to arrange faux flowers on top of your pumpkin or around it, and then attach them with glue.
8. Autumn Leaves Candle Jar
A leaf candle jar will give you a soft lighting option perfect for cloudy fall days and when days grow shorter. All you need is a glass jar, rubbing alcohol, Mod Podge glue, a sponge brush, fabric leaves, and a battery-operated tealight.
After washing the jar, apply rubbing alcohol all over the jar to help the leaves stick. Then, use your sponge brush to apply Mod Podge where you want to place your first leaf. Once the Mod Podge is tacky, apply your leaf to the jar. Fabric leaves may stick more easily without the plastic stem – which you can peel off.
After placing your first leaf, apply Mod Podge to the next area where you want to place a leaf. You can sponge additional Mod Podge onto the edges of leaves to help them lay flat. Once your jar is covered in leaves, add a final coat of Mod Podge covering the entire surface of the jar and let dry overnight.
The next day, the glue will be dry and you’ll have a gorgeous jar covered with colorful autumn leaves. Add a tea light to complete the craft.
9. Button Pumpkins
A button pumpkin is a fun assembly craft that everyone can enjoy. All you need is a piece of burlap, glue, and a lot of buttons of all sizes. Smaller beads can also add a touch of sparkle and dimension to your craft. With a large collection of orange and green buttons, you can create the shape of a pumpkin into a whimsical fall craft.
Start arranging the buttons on your piece of burlap. Before gluing, you may want to play with the shape to get the perfect pumpkin look. Once you have your shape, start gluing down the buttons to complete the craft.
Join In on the Fun at The Estates at Carpenters
At The Estates, there’s always something fun to do, no matter the season. If you’d like to learn more about our independent lifestyle, give us a call at 863-583-5911 or schedule a tour.